How to Add an Old Film Look in Premiere Pro
Last UpdatedOctober 4, 2023
by
Anthony Gallo
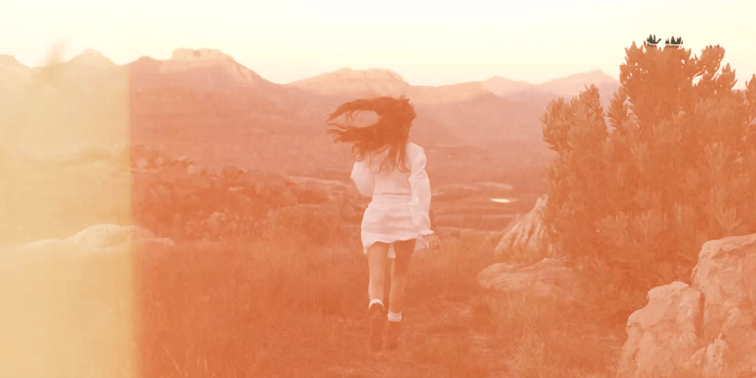
Are you looking to take your videos back in time with an old film look in Premiere Pro? Well, you’re in the right place.
In this article, I’ll show you how to make modern footage look vintage in Premiere Pro.
First, we’ll learn how to do it manually, then I'll show you how to achieve a vintage look using overlays.
How Do You Add an Old Film Look to Premiere Pro?
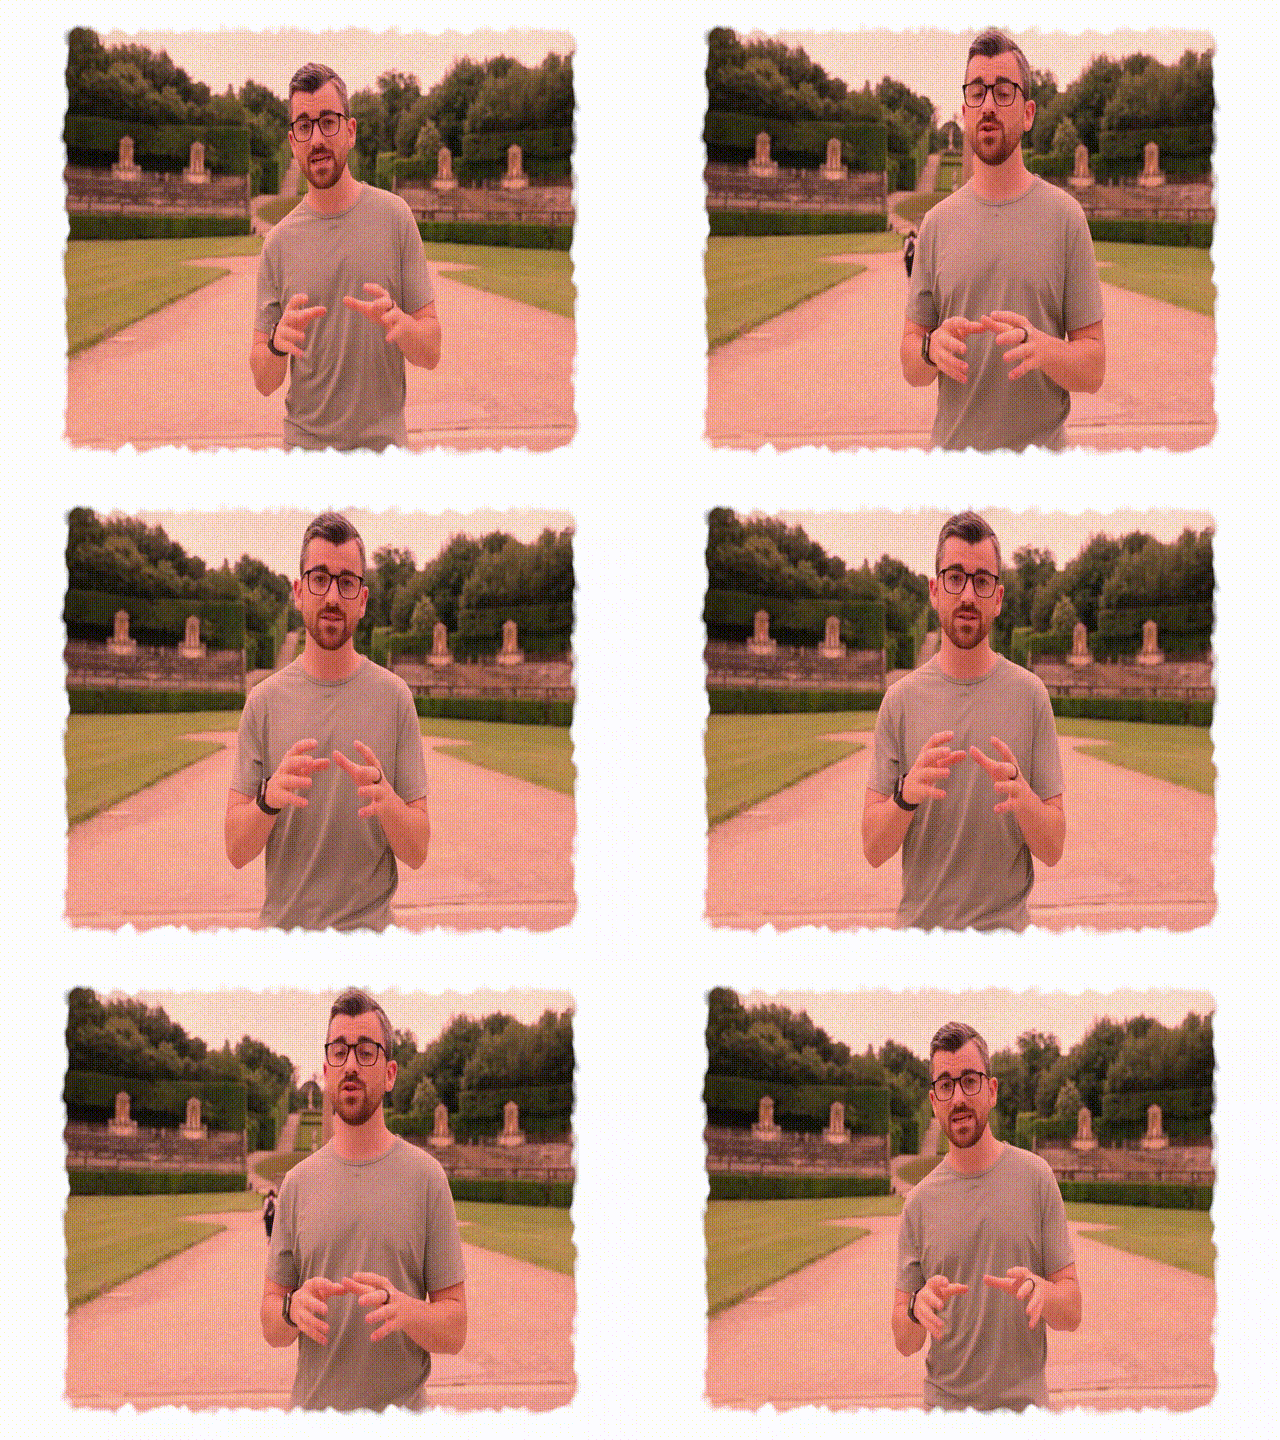
Create a vintage film effect by adding a sepia tint, cropping and adding rough borders, overlaying film effects like light leaks and scratches, adjusting color balance for shadow and highlight tones, and finishing with a film grain overlay.
Let’s take a closer look at those steps:
1. Add Color Effects
Start by adding a sepia tint to your clip using the Tint effect:
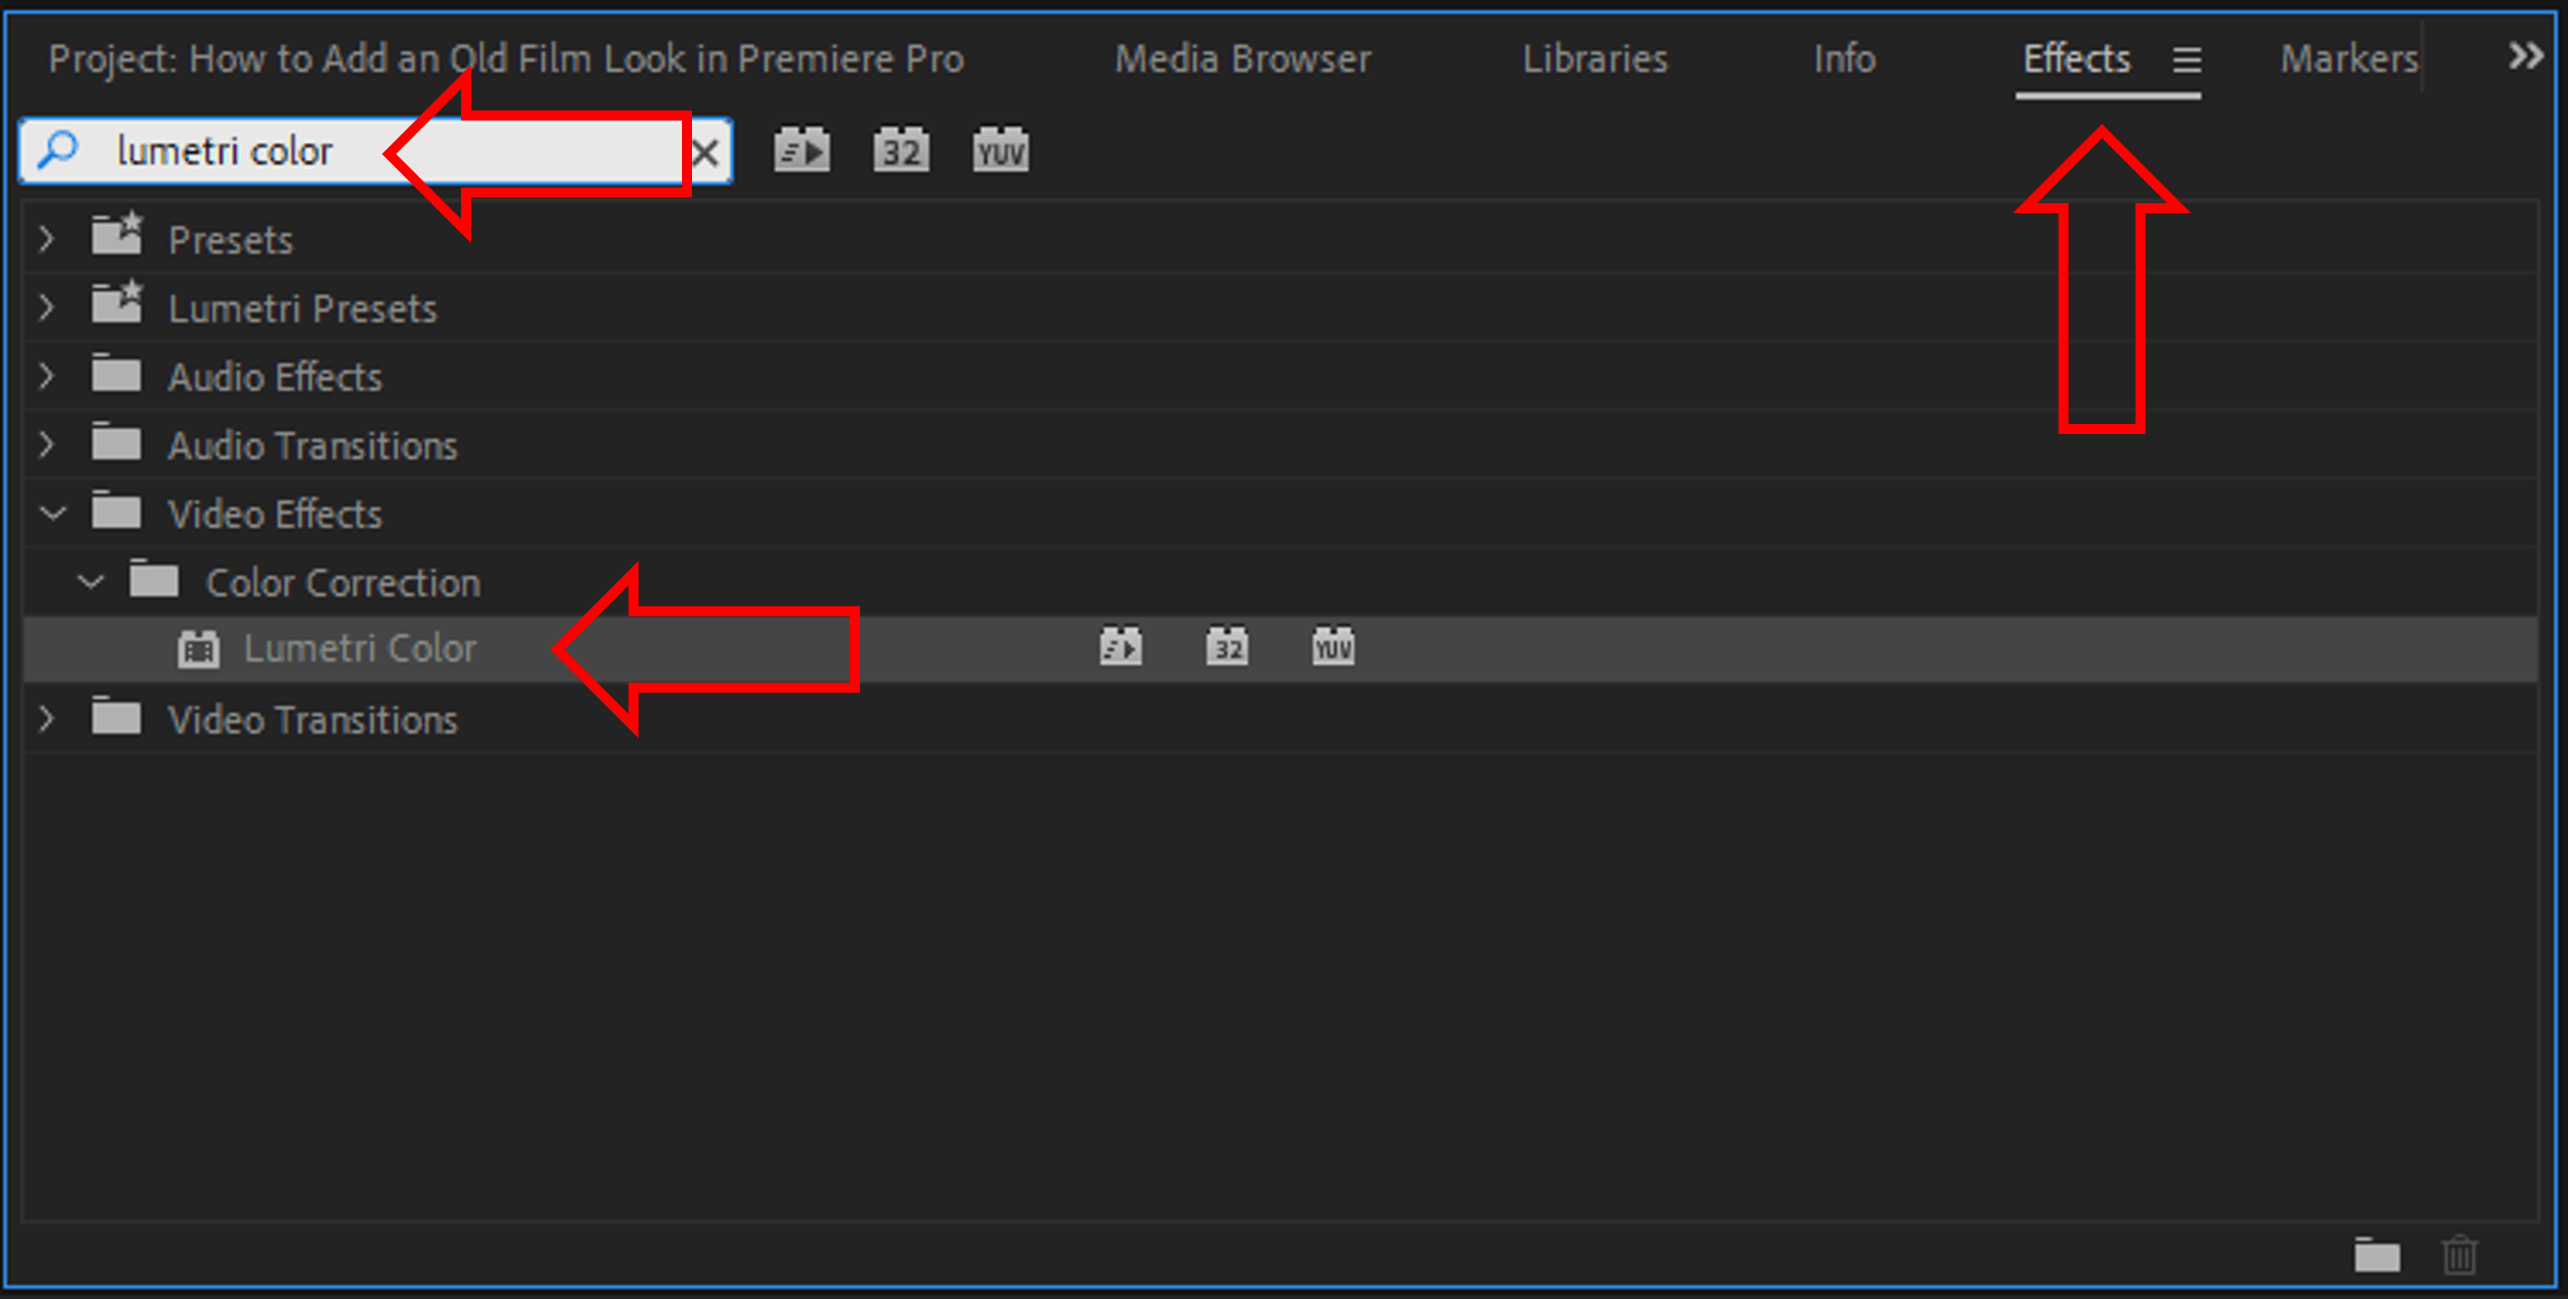
- Navigate to the effects panel search for ‘Lumetri Color’.
- Drag the Lumetri Color effect onto your desired video clip or other object on the timeline.
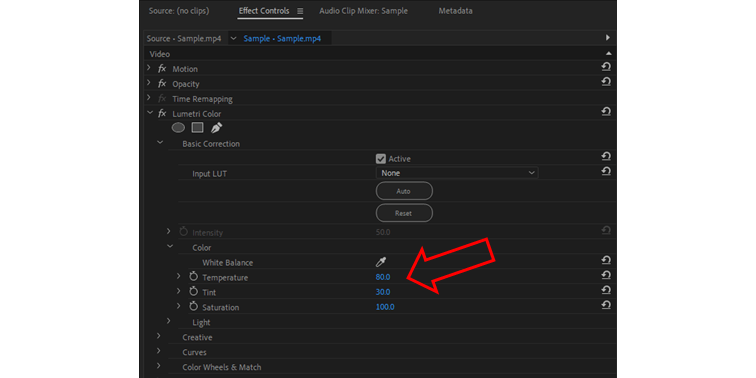
- Navigate to the Effects Controls panel and in Lumetri Color > Basic Correction > Color, set ‘Temperature’ to 80, and ‘Tint’ to 30.
2. Crop Your Footage
Use the Linear Wipe transition effect to crop your frame slightly at the top, bottom, and sides:
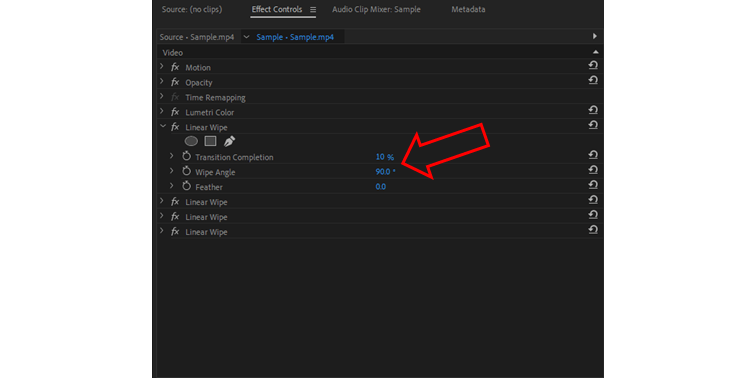
- In the effects panel, search for ‘Linear Wipe’ then drag and drop this 4 times onto your desired clip. Liner Wipe will trim the edges of your footage.
- I used 10% for ‘Transition Completion’, which is a fancy way of saying “how much do you want to trim from the edge”.
- I also added a ‘Wipe Angle’ of 0, 90, 180, and 270 for the four ‘Linear Wipe’ effects respectively.
4. Roughen Edges
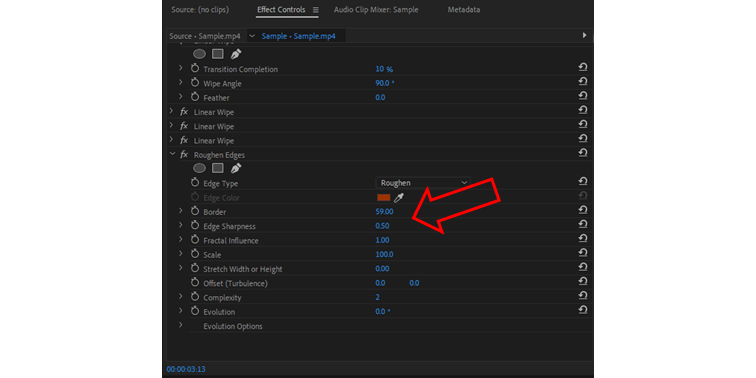
Add the Roughen Edges effect to add rough borders around the frame, making it look like old film:
- Search for ‘Roughen Edges’ in Effects, drag and drop the effect onto your clip.
- Navigate to the effects panel and adjust your ‘Roughen Edges’ effects.
- You can adjust a range of effects including Border, Edge Sharpness, Fractal Influence, Scale, Complexity, and Evolution.
- I adjusted ‘Border’ to 59 and ‘Edge Sharpness’ to 0.5
- You can also try adding keyframes to the ‘Evolution’ effect for a cool animated effect in your footage.
5. Add Noise
Finish your old film look off with some noise - adjust the amount until you achieve the desired vintage look.
- Navigate to the Effects Panel, search for Noise and drag onto your clip.
- Adjust ‘Amount of Noise’ to about 15%, try not to overdo it.
How-to Add an Old Film Look to Premiere Pro Using Overlays
If you’re spent for time or just want an easier way to add a vintage old film look to your Premiere Pro clips, the best way is to simply download an overlay.
Content Creator Templates will give you access to a range of overlays to give your footage that vintage old film look. Everything from 8mm film burn, various film mattes, and even Analog VCR static glitch overlays.
Simply sign up at Content Creator Templates, search for Film Grain and Vintage, download your assets and import them into Premiere Pro!

Wrapping Up
With these steps, you can easily make your modern videos look like they came straight out of the film archives. Experiment with all the effects in Premiere Pro to create the perfect old film style.

Anthony Gallo
Anthony Gallo is the cofounder of ContentCreator.com and lead educator in the online course 14 Day Filmmaker, that has taught over 100,000 aspiring creators how to shoot & edit professional video content with PRO and SMARTPHONE cameras.
Having created content in a variety of industries including commercial advertising, weddings, music videos, and hundreds of youtube videos, Anthony has amassed over 50 million views online and is constantly looking for new and engaging ways to create content and help others master this amazing craft.